Written by: Lindsay Berceau
If you have an appreciation for the theatrical and you’re interested in taking your makeup skills to the next level, then this project is for you! One of the really fun career paths for Estheticians and Cosmetologists is working on movie sets as a Makeup/Prosthetic Artist. This is the kind of thing you could do for a living! Can you believe how awesome that is??
Or maybe you’re just looking for a last-minute Halloween costume, look no further – this DIY Zombie mask project will have everyone at your Halloween party shivering with goosebumps! Green Bay Esthetics Student Lindsay Berceau walks us through the steps. Here’s how to get started…
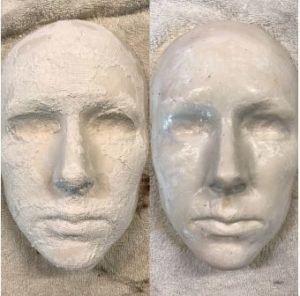
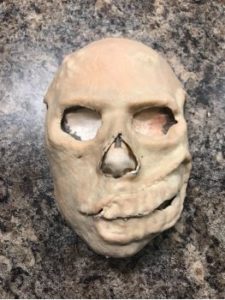
The first step to making the mask is to create a mold of your own face so you can sculpt what you want your mask to look like. I used plaster strips from hobby lobby and covered everything except my eyes and nostrils. Once it dried I removed it from my face and covered up the holes before I filled the mold with plaster. To save time and make this step easier, you can put down a mold release before pouring in the plaster (this will also save time on cleanup). The photo above is before and after I cleaned it up and sanded it down.
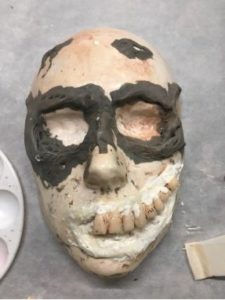
Once the sealer on my plaster mold dried I created the sculpt of what I wanted my mask to look like. I added the teeth in here to figure out where I wanted them to go (pictured below). Once I was done creating the sculpt, I removed the teeth prior to adding liquid latex.
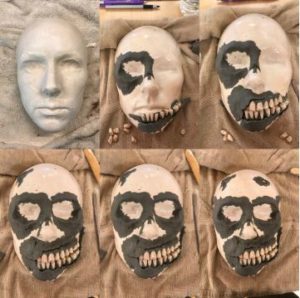
I also added a layer of Vaseline before adding latex so that the latex would peel off easier when I removed it from the mold. The 3 photos below are before adding any latex, after 1 layer of latex, and after 15 layers. I used a blow dryer to dry each layer in between.
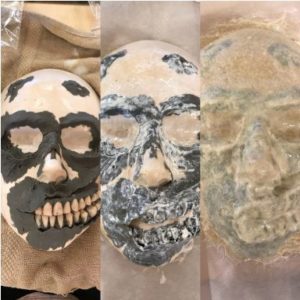
After it was all done I probably could have gotten away with 10 layers of latex. It was a little thicker than I wanted it to be. Also a lot of the details got lost because I used so much latex.
Once everything was completely dry, I carefully peeled the latex off, powdering it as I went because latex sticks to itself. If I didn’t powder it, it would have ended up in a giant ball of latex, so don’t skip this step!
After I peeled off the mask from the mold, I trimmed around the edges and cut out the eyes, nose and mouth. The mouth didn’t come out like I wanted at all so I ended up cutting out the mouth completely and made the mouth completely separate, as pictured below.
This is where I built up the teeth and cut out the mouth so I could have a mouth hole. It’s a similar process to adding the layers of latex, but I ended up using cotton balls and latex so I didn’t need to use as much latex.
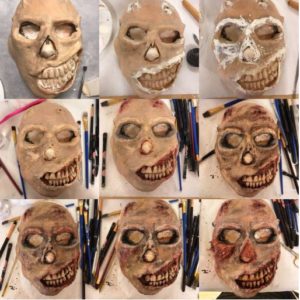
This is where the fun part began – now to paint and add details! I used alcohol activated paints for long-lasting color. I also used red yarn and cotton with more latex for texture to make it resemble dead, rotting skin.
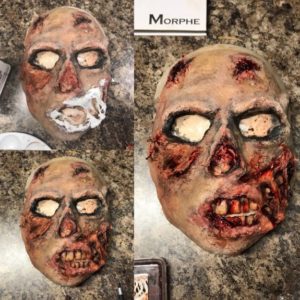
The mouth still seemed too “open” for my taste so I ended adding more cotton and latex to create skin flaps. The picture on the right I added fake scab blood for extra details.
Prior to putting the mask on my face, I colored around my eyes, nose, and mouth black to blend in with the mask. I used skin-safe prosthetic adhesive to attach it to my face.
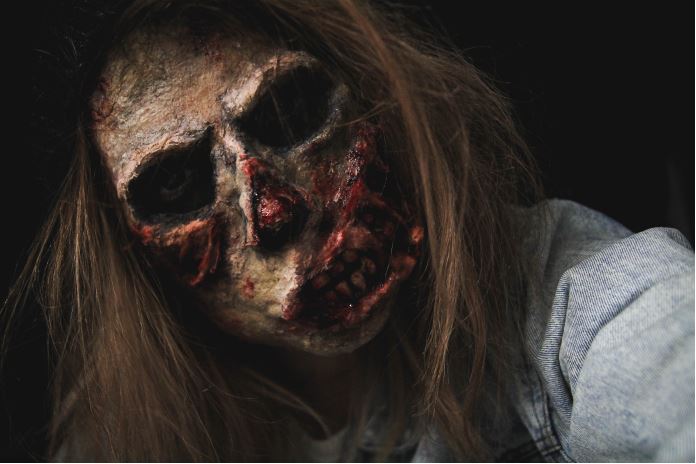
FINAL LOOK:


Try it out this Halloween! We want to hear how it goes – post results and pictures in the comments below!

Lindsay Berceau is a
current Esthetics student at
the Academy of Beauty
Professionals – Green Bay.
Learn more about our Esthetics program here!